Showing posts with label Recipe. Show all posts

02/04/2012

Squid Salad Thai Style

In sync with our resolution to eat healthy, we tried our best to eat as much as vegetables as possible. That includes having them raw as salad, lightly stir-fried or blanched.

One of my favourite salads is thai style salad. I have a penchant for Thai cuisine having living in a hometown that is mere 20 minutes away from the Thailand border.

We have small amount of frozen squids in our freezer and I decided to make a thai style salad out of it. It is easy and simple to make and most importantly I can use my favourite herb, coriander as abundantly as I want. As most of recipes are based on the agak-agak method, please bear with me the measurement.

Ingredients:
Squid - blanched
1/3 of cucumber - skin peeled, halved & thinly sliced
2 tomatoes - quartered & thinly sliced
2-3 stalks of lemon grass - thinly sliced
4-5 bird's eye chilli - thinly sliced
Coriander - chopped
Lime juice - can be substitute with vinegar or lemon juice
Fish sauce or salt & sugar to taste

Method:
Combine every ingredient in a bowl. Add fish sauce (or salt), sugar and lime juice. Mix it all together and taste. Thai cuisine largely has 4 subtle flavours; sweet, salty, spicy & sour.
Ready to serve.

*Instead of squid, you can also use beef, prawn or the original ingredient - chicken feet's skin.


*Gambar takde sebab dah lapar sangat maka terlupa nak ambik.

16/02/2012

Hainanese Chicken Rice

Nasi ayam plays a significant role in my life. Being a fussy and picky eater when I was small, I would not eat anything that doesn't please me. But somehow I found my comfort in nasi ayam and mee kolok. If anything else fails, offer me these two and I'll happily indulged.

The other night after running out ideas on menu for dinner, I suddenly thought of Hainanese Nasi Ayam and its succulent steamed chicken juice and savoury fluffy rice. There are hundred of thousands of such recipes on Google but after trying out for the first time back in my student years, this recipe is my favourite.

My husband prefers grilled over poached chicken so I made humble Ayam Panggang to accompany the chicken rice instead. I will share the recipe of the grilled chicken in another entry.


Ingredients: 

1 whole chicken [2½-3 lbs]
5-6 stalks fresh scallions
6 inch fresh ginger, peeled, cut into thick slices
2 tsp soy sauce
1 tsp sesame oil
2 additional stalks fresh scallions, chopped, for garnish [optional]
1 seedless cucumber, peeled, halved and sliced diagonally
a few sprigs of fresh cilantro, for garnishing
½ tsp white peppercorns
salt

Ingredients for Chicken rice:

3 cups long grained rice, washed and drained
1 tbsp chopped garlic
2 tsp salt
2½ tbsp chicken fat or vegetable oil
6 cups, or more, chicken broth [from the cooking broth]
6 pandan leaves [screwpine leaves] [optional]

Ingredients for Special Chili Dipping Sauce:

1 tbsp kaffir lime juice [Substitute: lime or lemon juice]
1½-2 tbsp chicken broth [from the cooking broth]
2 tsp sugar
4 tbsp hot chili sauce
4 cloves garlic, finely ground or mashed
1 inch ginger, finely ground or grated
salt

To Prepare Special Chili Dipping Sauce:

Mix hot chili sauce with lime juice, sugar, garlic, ginger, chicken broth [spooning some of the chicken fat oil] and salt to taste
Pour chili sauce into small condiment dishes, for each individual serving

Cook's Note : This meal can be made a low-fat diet dish. Skim and discard any residual fat/oil from the chicken broth before cooking the chicken rice. [Best if chilled in the fridge for easy removal of fat/oil]. You may also remove the skin from the cooked chicken before serving.

To Prepare Chicken:

  1. Cut off any excess fat, reserve for using to cook rice, wash chicken, drain well, stuff ginger slices and scallions stalks into the cavity of the chicken.
  2. In a large stockpot, add sufficient water [to cover the chicken], white peppercorns and about 2 tbsp salt, bring to a boil
  3. Submerge the whole chicken, breast-side down in the boiling water, and immediately reducing the heat to a slow poach
  4. Cover, poach chicken for about 45-50 mins, [check to make sure the water does not 'boil' the chicken]
  5. When chicken is cooked, remove and plunge immediately into a bath of icy cold water, submerging the chicken for about 10 mins
  6. Remove chicken from the ice bath, discard ginger slices and scallion stalks from the cavity, drain the chicken well, set aside - meanwhile cook the chicken rice
  7. When the chicken is cool enough to handle, cut it neatly into serving size pieces [de-bone chicken, if you prefer]

To Prepare Chicken Rice:

  1. Wash rice till water runs clear, drain well
  2. Heat wok on high, add the reserved chicken fat, render into an oil to about 2½ tbsp [add vegetable oil if chicken fat oil is insufficient ]
  3. Add chopped garlic, stir-fry for a few seconds
  4. Add the raw rice, stir-fry till the rice grains start to look translucent, about 8-10 mins
  5. Transfer rice to a pot, add 6 cups chicken broth, salt and pandan leaves 
  6. [*Note: depending on the type of rice, use more or less of the chicken broth]
  7. Bring to a boil, reduce heat, simmer uncovered, until the chicken broth is absorbed by the rice [small 'bubble' holes start to appear on the rice]
  8. Reduce heat to very low, cover the rice with a tight-fitting lid, cook for a further 10-12 mins
  9. Turn off heat, DO NOT open the cover, wait for 10 mins before opening [steam inside will gently finish steaming the rice]
  10. Fluff up the rice with a fork [If rice is not fully cook, simply add a little chicken broth, cover and steam on very low heat for another 5 mins or so]
  11. Alternatively, 'fry' the raw rice in a wok until translucent, then transfer into an electric rice cooker and add sufficient chicken broth to cook
  12. Any leftover chicken broth after making the rice, can be served as a small side soup, garnished with some chopped cilantro
  13. Line a serving platter with cucumber slices, arrange chicken pieces on top, sprinkle with soy sauce, sesame oil, and garnish with chopped scallions and cilantro sprigs

Serve Hainan chicken [usually served at room temperature] with chicken rice, side soup - and special chili dipping sauce!

07/12/2011

Successful Second Attempt

Last week, I tweeted about it and I share the photo in my Facebook. We fell in love with it after we had our very first bite at Serai in Empire Gallery. The crispy yet soft meringue topped with whipped cream and the sweet sour taste of the fresh fruits is very hard to forget. The Pavlova is a dessert originated from Australia was said to be created to honour the ballerina Anna Pavlova when she visited the country.

Since then, I have been promising H to bake him a Pavlova, a promise that I haven't been able to materialize before he left. I am not an avid baker so baking a meringue would be a challenge to me. Since my first attempt failed, I am more determined than ever to make it work (in Tim Gunn's voice) and I did! Ok, perfectionist trait alert!

This is the recipe that I use taken from The Joy of Baking:

For meringue base:

4 large egg whites
1 cup (200g) (superfine) castor sugar - 
Personally, I find that 1 cup of sugar is tad too sweet, you might want to reduce it to 3/4 cup
1/2 teaspoon pure vanilla extract
1 teaspoon white vinegar
1/2 tablespoon corn starch (corn flour)

Topping:

1 cup (240ml) heavy whipping cream
11/2 tablespoons (20g) granulated white sugar (or to taste)
I used about 1 tablespoon of castor sugar cos I don't like my whipped cream to be too sweet
1/2 teaspoon pure vanilla extract

Method summary:
For full method please go to the link

Preheat the oven to 130 degree Celcius (C). I heated the oven to 250 C before adjusting it back to 130 C seconds after meringue is inserted in the oven. The idea is to have the meringue to get the "heat shock" so that the exterior will be crispy. This tips is given out by Nigella Lawson.

Draw a circle on your baking sheet. About 7-8 inch. This will guide how big you want your meringue base to be.

Beat the egg whites until soft peak is formed. Add in sugar, 1 tablespoon at a time. Beat until stiff peak is formed. Make sure that all the sugar added has dissolved. To test, rub the white eggs sugar mixture between your fingers. If it feels gritty, sugar has not dissolved so keep beating until it feels smooth. Add in the vanilla extract. Sprinkle the vinegar and corn starch over the mixture. With (rubber) spatula, gentle fold in. Don't stir as it will "ruined" the lightness and air trapped inside the egg whites.

Pile up the mixture inside the circle drawn onto the baking sheet, smoothing the edges and make sure the edges are slightly higher than the center. Bake for 60-75 minutes or until the outside is dry and is a very pale cream colour. Turn the oven off and leave the door slightly ajar to cool off the meringue. The outside of the meringue is firm to touch but as it cools down you'll get cracking and you'll see that its soft marshmallow-like on the inside. That's how you know you've baked a perfect meringue.

Whip the cream (I like to use hand whip, easier for me to control the speed) until soft peak forms. Sweeten with sugar and add in vanilla extract.

Pavlova - Pre-assembly

Mound the whipped cream onto the center of the meringue and arrange fruits randomly. My favourite fruits for pavlova are blueberry, raspberry, strawberry and pomegranate seeds. You can also use lychee, kiwi, mango, passion fruit or any imaginable fruits.

Pavlova - Imma proud momma!

Selamat mencuba! And do inform me of your successful stories!


21/11/2011

On Failed Attempt

My first attempt at making pavlova, failed terribly and miserably. I followed this recipe but somehow I couldn't get the right consistency of the meringue, the utmost crucial part of a pavlova. The perfect meringue for pavlova should have a crispy exterior but a soft, marshmallow-like interior. I made 2 sets of half-dozen mini pavlovas, all turned out to be chewy and limp looking meringue (if it even qualifies to be called one!). 1 batch however have that soft crispy exterior but despite it all, still failed.

I managed however to whisk and get the right texture of the whipped cream (yay!) which is a biggie to me because most of the time, I just tend to over-whisk the cream. Full of energy, much? Lol.

Despite surrounded by failure and I was on the brink of throwing it away, I suddenly got an epiphany (gituh! tak kuasa mak!)


Or rather, in my case, when life gives you chewy, limpy-looking meringue...

you make an Eton Mess!

via Lovefood

Great dollops of chilled whipped cream, strawberries, blueberries and ruby-like pomegranate seeds and my version of Eton Mess is good to go! On any occasion, I wouldn't dare offering something that is less than perfect for anyone's consumption so I happily dig in and indulge myself.

I am one happy girl. And yes, life is indeed a bliss when you just can look at things positively.

And I am NOT giving up on the pavlova. Not yet. 

13/07/2011

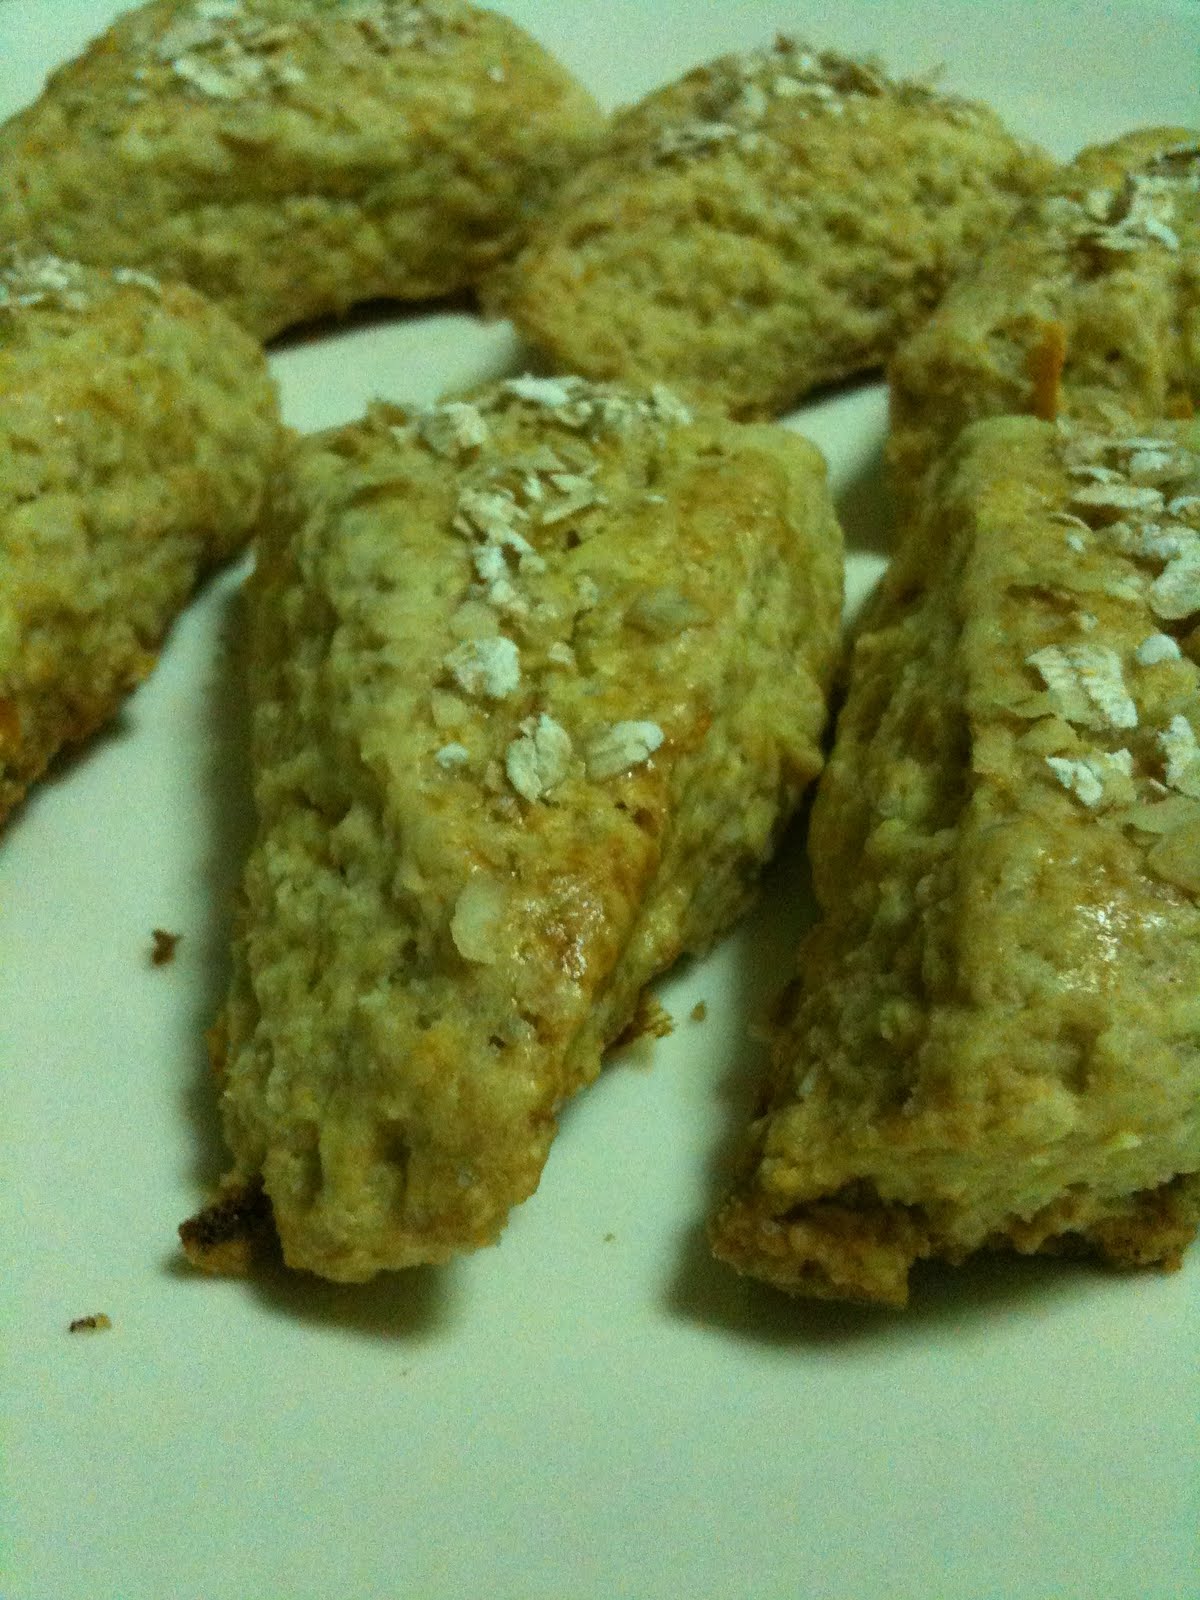
Oatmeal Scones

To be completely honest, baking isn't exactly my forte. I have a love and hate relationship towards baking mainly because unlike cooking, baking cannot guarantee you a 100% successful rate. What makes baking more challenging is that, the result cannot be predetermined and not to forget, the aftermath mess that is equally challenging. Over the years, despite my mixed feeling, I had indulged in few baking sessions.

And after years of hanging hand-whisk over the shelf, I braved myself and get down dirty to try out this recipe of Cranberry Oatmeal Scones


1 3/4 cups (245 grams) all purpose flour
1/2 cup (100 grams) granulated white sugar
1/4 teaspoon salt
3/4 teaspoon baking soda
1 teaspoon baking powder
1/2 cup (113 grams) (1 stick) unsalted butter,cold and cut into small pieces
3/4 cup (60 grams) old-fashioned rolled oats*
1/2 cup (60 grams) dried cranberries or cherries (raisins or currants)*
Zest of one lemon or orange (outer skin of lemon or orange)
2/3 cup (160 ml) buttermilk*

Egg Wash:

1 large egg
1 tablespoon milk or cream

* I omitted cranberries since I didn't have any and substitute rolled oats with the instant oats that I have in the kitchen. 
If buttermilk is not available in your local supermarket, you can make your own by adding 1 tablespoon of white distilled vinegar, cider vinegar, or lemon juice to 1 cup of milk. Let stand 5 to 10 minutes before using. Buttermilk adds creamier taste to your scones.

Method:

Preheat the oven to 375 degrees F (190 degrees C) and place rack in center of oven. Line a baking sheet with parchment paper and set aside.

In a large mixing bowl place the flour, sugar, salt, baking soda, baking powder and whisk to combine. Add the butter and using two knives or a pastry blender cut in the butter until it resembles coarse crumbs. Add the rolled oats, dried cranberries and zest. Mix until combined. Stir in the buttermilk (adding more buttermilk if necessary) and mix just until the dough comes together.

Transfer to a lightly floured surface and knead the dough four or five times and then pat, or roll, the dough into a circle that is 7 inches (18 cm) round and about 1 1/2 inches (3.75 cm) thick. Cut this circle into 8 triangular sections. Place the scones on the prepared baking sheet. Make an egg wash of one beaten egg mixed with 1 tablespoon milk or cream and brush the tops of the scones with this mixture.

Bake for about 15 -18 minutes or until lightly browned and a toothpick inserted in the middle comes out clean. Remove from oven and transfer to a wire rack to cool.

Makes 8 scones.

Try it and you'll love it!


p/s: Sorry for the crappy photo quality. I couldn't be bothered to use H's DSLR and took it using my camera phone instead. But the taste wasn't as bad as it looked.